Showing posts with label lens. Show all posts

Wednesday, October 29, 2008

Readying the telescope

After managing to set aside a couple of hours, I was ready to clean and set up the telescope for some serious stargazing. It's been several months since I last used my Newtonian reflector--the Indian monsoon facilitates stargazing about as much as a hurricane does building a house of cards. Now that the Indian winter is upon us (yes, all 24 degrees of it--Centigrade!), the skies are finally clear with some of the most gorgeous constellations visible.

It all had to start with extracting the telescope from that inconveniently unreachable spot under the bed. Shuddering to think of what months of neglect would do to the telescope, I pulled out the large 4-foot bag (after moving several unknown, dusty boxes out of the way), and marveled at the way it was completely overrun with dust bunnies. Clearly, the first order of business was to wipe and wash it down. Without actually unzipping it and having those tufts of dust attack any of the components, I used a bit of elbow grease and got the bag to a relatively decent, presentable state.

Next, I gingerly opened the bag, hoping to discover the insides were spared of the under-bed filth. Fortunately it was, but only just. It beats me how dust finds its way into sealed zippers and plastic bags: the entire telescope assembly was coated with a fine layer of dust, enough to sign my name on.
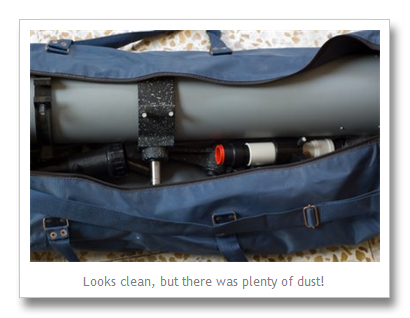
Armed with a damp cloth, I got down to cleaning all the telescope's components and accessories. Here's what I was up against:
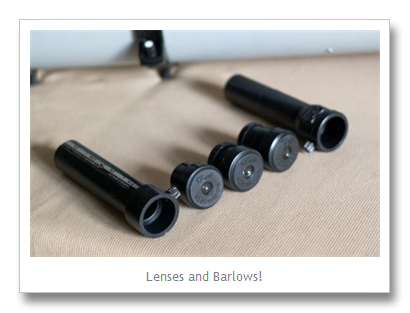
From left to right, there's the 1.5x - 3x variable Barlow, the three eyepieces (12mm, 17mm and 25mm), and the fixed 4x Barlow. These eyepieces provide different levels of magnification, and the Barlows are used to increase the effective magnification of the eyepieces when used in conjunction. There was also the 4-foot telescope tube and the wrought iron tripod that needed wiping down.

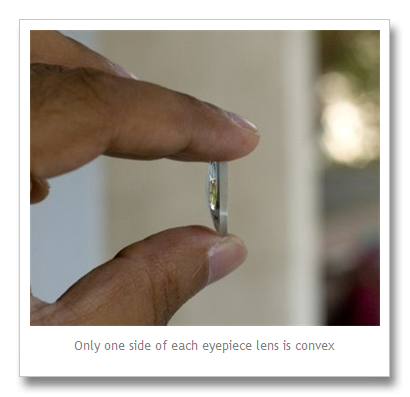
I started out by disassembling each of the eyepieces. Each eyepiece is composed of two half-convex lenses that provide a fixed magnification. Instead of using a single lens, a pair of lenses are used for better image clarity and lower distortion. I cleaned each of these two little lenses with a soft cloth, and re-mounted them with their convex sides facing each other inside the eyepiece.
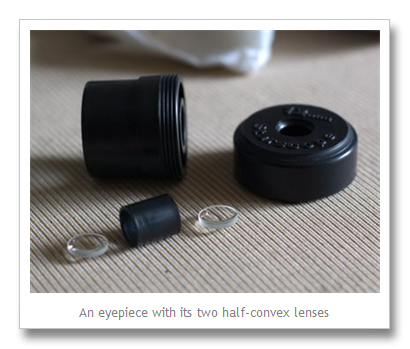
Here's what a half-convex lens looks like:
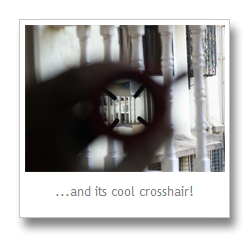
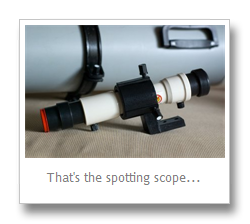
After cleaning all of the eyepieces, I focused on the spotting scope. The field of view in an astronomical telescope can be really small--especially at higher magnifications--making it painful to hunt around the sky while searching for Saturn or Andromeda. That's where the spotting scope comes in. This is a mini-telescope that is mounted on the main telescope. It helps find those elusive planets and stars in a crowded sky. There's a cool-looking cross hair in the telescope that enables you to pinpoint a celestial object, making it easier to view through the main telescope.
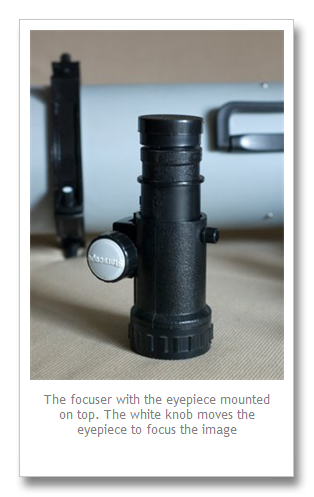
Next up was the focuser--this is a rack and pinion assembly that enables you to mount an eyepiece and move it back and forth to focus on a celestial object. You can change eyepieces depending on the magnification you need--a little thumbscrew holds them in place a the top of the unit.

Here's what the focuser looks like:
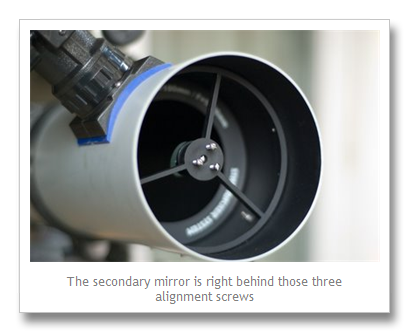
The secondary mirror was easier to clean because it's accessible from the open end of the tube and is small. I jiggered its alignment in the process, but I'd fix that later on during the collimation process.
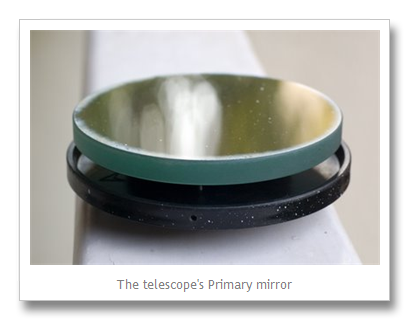
Finally, the primary mirror--the most important component in a reflector telescope. I removed it by unscrewing three screws and extracting it along with its base. After all those years, it showed signs of age with tiny pitting and visible dust grains.

The best advise for cleaning any of the mirrors in a telescope is--DON'T! These mirrors are precision ground, and the reflective coating is on the outside (unlike ordinary household mirrors), making it easy to introduce nicks and scratches if touched. And if this happens, it can severely degrade viewing quality. I decided that the lens was not dirty enough to affect image quality, so I stayed off it.

Note: If you're thinking of cleaning your telescope's lenses or mirrors, see here for interesting techniques on how you can do so effectively and safely.
I was now finally ready to put these components together and get the telescope on its feet. This is how it all looked at the end of the two-hour cleaning and servicing spree:

After all the disassembly and re-assembly, the mirrors in the telescope were outrageously misaligned! So I collimated the telescope using the excellent (though involving) method described in this article from Sky and Telescope. You'll also find an excellent tutorial on collimation in this video here.

Now all I have to do is wait for the skies to clear up after the brief buildup of smog due to the Diwali firecrackers. Then, Orion--here I come!

Note: You'll find more details about my telescope's specifications in my previous blog entry.

Friday, September 26, 2008

My photography gear

I've been passionate about photography for several years now. I admit -- I wasn't that into the field during its film days (not like that was too long ago!), but I really got into it during its crossover into the digital realm.

As the former editor of a popular computer magazine in India, I've had the opportunity to work with numerous digital cameras over the years. I've owned several digital cameras during the time -- the Canon PowerShot A60, the Fuji FinePix S5500, and more recently the Nikon D40 (this is my second one -- the first was stolen. T'was indeed a sad, sad day in my life).

Nikon D40The best entry-level DSLR. Period.
I've been extremely satisfied with the D40 kit, and would dare say that it's the most brilliant piece of photography equipment in its class. It is compact, delivers excellent imaging performance, and is extensible. Right now, I really don't see any reason to upgrade to a camera beyond 6 megapixels (if I need to print photos, I can comfortably do so at A4 sizes at excellent detail levels). Given that this is an SLR -- and a happily compact one at that -- it blends in so well during my photography jaunts. I think the size of a camera has a fairly significant bearing on a photographer's ability to blend in. Walk up to someone while holding a huge camera and lens, and you're sure to get a dose of 'camera coyness', effectively destroying any opportunity for that desirably natural shot! Coming back to the D40 -- it embodies a blend of great usability characteristics and feature benefits. And it's got the lineage and DNA of great SLR performance.

It's all in the glass
I'm firmly believe that a camera is 90 percent about its lens. The rest follows. So when people ask me how many megapixels they should look for in a camera, or how much zoom it should have, I advise them to consider the following specifications: quality of the lens, sensor rating (size and megapixels--the more the merrier), form factor, creative functionality, battery life, and extensibility. Of course, the importance of these specifications decreases with your seriousness towards photography -- if it's a point and shoot pocket device you're looking for, where convenience overrides everything else, most cameras in this class are closely matched on image quality and functionality. The differences are more noticeable when you're looking for good imaging performance.
That said, the stock 18-55mm f/3.5-5.6 AF-S lens that's bundled with the D40 is a pretty good performer, given the overall price bundle. But I was looking for a bit more telephoto performance, and a good portrait lens. Without breaking the bank, of course.
I found the answers in a Sigma 18-200mm f/3.5-6.3 DC OS HSM lens, and a Nikkor 50mm f/1.8D prime. 

Sigma 18-200mm f/3.5-6.3 DC OS HSM After much research (and diligently poring over imaging charts, sample photos, spec listings and price comparisons), I decided this Sigma 18-200mm was the lens I was looking for to serve my everyday shooting needs. It is versatile, capable, relatively compact, and offers pretty decent performance. Sure, it isn't best-of-class in any of these, but when it comes to lenses, it's difficult to get everything in a single package! The 18-200mm zoom offers pretty good wide angle and telephoto performance, the integrated motor plays well with the D40's requirement for AF-S auto focusing, and it has optical stabilization resulting in lesser motion blur in low light and telephoto shots. Spec for spec, I found this better than a similar Tamron lens. Of course, the Nikon 18-200mm f/3.5-5.6G IF-ED AF-S VR DX is the best you can get in this class, but it's also priced 45 percent higher than the Sigma 18-200mm! *Sigh*

Nikkor 50mm f/1.8DThe Nikkor 50mm f/1.8D is a very interesting lens. It's a fantastic piece of imaging glass, boasts excellent clarity, and delivers delicious depth of field. Add to that, it's small and very light (not the kind that will intimidate your subjects!). It gets better--it's priced at under Rs 6,000! Too good to be true? Well there is one small downside -- this lens is not the AF-S kind, and therefore lacks the integrated autofocus motor. So, while the lens can autofocus when used with cameras that have a built-in focusing motor, the lens cannot autofocus with cameras like the Nikon D40. But I decided its pros far outweighed the cons. Plus, using the manual focus is easy after a bit of practice. Besides, manual focus builds character and puts hair on your chest! With the D40's 'green dot' focus indicator in the viewfinder, it doesn't take too long to get used to. At the end of the day, the results are well worth it. Check out some of photos with these lenses in my Flickr photostream.

RAW versus JPEG
I always shoot in RAW format, and I always process the images individually using Adobe Camera RAW. The world around us varies so much in lighting and environment, that it's necessary to work on photos to extract the best from them. People often argue that the best photos are the ones that aren't 'touched up'. I disagree. Digital photography now allows us to extend the capabilities of the hardware in ways that were never possible back in the film days. And it's faster and more convenient. So why not use the technology to the hilt? RAW processing has enabled me to take some pretty satisfying photos, and it's easy when you have a good workflow going. If you want to venture into the world of RAW photography, check out this excellent tutorial on shooting in RAW from one of the foremost in the field. Of course, if you couldn't be bothered with the added overhead of RAW image processing, you could always set your camera to shoot in JPEG. But that's less than ideal. And once you begin to experience the inherent superiority of a RAW-processed image, you'll never go back to JPEG -- I guarantee it.

I could go on, but let's leave some for another post! Leave a comment if you need more information on any of the hardware, techniques, or concepts I've touched upon here. Cheers!

Related Posts with Thumbnails