Saturday, May 28, 2011

Extending your HTC Desire’s battery life

DesireI’ve been asked for suggestions on how to do this a ton of times; here are several tweaks I use for my HTC Desire that easily extend its battery life to get me through the day. And with charge to spare. Do these (in no specific order):

  • Disable 'Background Data' from Settings | Accounts and Sync. This notorious setting sucks battery life big time by keeping tons of Google apps (Gmail, Contacts, Calendar etc) continuously in sync. Better to just let these apps update only when you need them.
  • Install Advanced Task Killer--a super little app that lets you 'kill' unnecessarily running apps as often as you need. I invoke this several times a day; especially after extended bouts of using multiple apps. This one's a must-have.
  • Disable any radios when you don't need them (WiFi, Bluetooth, GPS). I've installed nifty shortcut widgets to these radio settings on my home screen--beats having to poke into the Settings screen each time.
  • Beware of installing unverified apps--some of these run continuously and suck battery life.

Bonus tip: If you know you’re going to be in a location with no cellular service, switch your phone to airplane mode. This disables all radios (including cellular,) and prevents your phone from ‘searching’  for a signal and draining its battery in the process.

Not just for the HTC Desire—these tweaks should work with virtually any Android device. Made a huge difference for me, but your mileage may vary.

Saturday, July 10, 2010

Must-have Android apps

android-logo A few months ago I traded in my Windows Mobile phone for an Android device. From the research I did back then, going over to the Android platform seemed like the most natural thing to do, given my requirements. And I haven’t regretted it since.

Sporting a fantastic user interface, spiffy response, plenty of great apps that can be downloaded and installed over the air, and the ability to synchronize all of my contacts and calendar information with the Google cloud makes it a very compelling proposition indeed. I’m also pretty happy with the capabilities and features on my Samsung i7500 Galaxy (5PM camera, LED flash, WiFi, Accelerometer, GPS, 3.2-inch AMOLED screen et al), though support is a different issue altogether—Samsung seems to have completely forgotten about this phone in their firmware update strategy. Be that as it may, Android is a great platform and one that I think I’ll be with for a while. Going by the industry and consumer support, and the strides they’re making with each release, Android is certainly in it for the long run.

I’ve tried out numerous apps from their store—some great, some that I disposed of not long after using them. So in no particular order (and in debatable classification), here are the ones that are on my phone to stay:

Fun

Shazam: Undoubtedly cool: can’t recall the name of that song on the radio? Shazam it!
Layar: A great augmented reality browser—you’ve got to use it to experience it
FxCamera: Fun image effects with your camera phone
Google Sky: Totally awesome—point your phone at a star and it pulls up info on it!
Foursquare: The social networking app that’s making waves—especially useful if you’re a party animal/pub crawler/foodie
Facebook: If you have a Facebook account (what? you don’t??) you’ll need this on your phone
10001 Cocktails: ‘nuff said
Barcode scanner: Works with most barcodes—fun to show off with
Fartdroid:
Yes, it is. Loads of laughs, and with timed release!
Schottgunn: A fun, senseless shotgun simulation app
AK-47: Like Schottgunn: a fun, senseless AK-47 app
Tesla sparks: Touch the screen and see groovy tesla sparks. Pointless. Fun.
The Schwartz Unsheathed: The glory of the Jedi light sabre in your Android phone—complete with cool sound effects!
Air horn: Great for waking up your colleague dozing off in the next cubicle at 3PM!

Productivity

Fring: A VOIP telephony app that connects to MSN, Google, Skype etc
K9 Mail e-mail client: A pretty feature packed and capable POP/SMTP mail client
AK Notepad: Great notepad/reminder application
Voice Recorder: Turns your Android into a dictaphone
Thesaurus: Never be at a loss for words
Wapedia: Wikipedia on your phone

Utilities

SlideIT: An excellent, intuitive alternative to Android’s default on-screen keyboard
Wifi Static: Switch Wi-Fi profiles, along with your phones’ IP configuration
Locale: Auto-switch features of your phone (ringer, Wi-Fi, bluetooth etc) based on your location
Astro file manager: Must, must have file manager
Opera Mini 5 Beta: An Android port of the browser you know and love
Dolphin browser:
A pretty cool browser; try it and you might like it
Ringdroid: Intuitively slice MP3s files right on your phone, then save them as ringtones!
Google Translate: Very handy if you’re travelling, or want to impress your better half with a pseudo-knowledge of French of Spanish
Photoshop for Android: A very scaled-down version of the bloatware imaging app we all know and love. No, it’s actually pretty nice.
MyBackup: Backup all of your Android’s data—great when flashing your phone
Android Agenda Widget: A neat widget that puts important calendar entries right up there on your home screen

Games

Poke-a-mole: Totally fun and very addictive
Trap: A very neat, and very addictive game—hard to explain, easy to get the hang of. Try it!
Hit the Penguin: If you’ve played the online Flash version, you’ll love this one
Abducted: Nice time-killer, uses your phone’s tilt sensor
Replica Island: Great 2D-side scrolling adventure game with neat graphics
Throttle copter: A fun side-scrolling ‘copter game
Paper toss: My favorite!
Chess: Uses a pretty challenging engine
Pinball: Yep, a classic way to kill time
Labyrynth Lite: A fun maze game that uses your phone’s tilt sensor

Thursday, June 3, 2010

Four steps: From point-and-shoot to pro!

Being a good photographer is more than just having the best equipment or getting plenty of practice. To be able to truly ‘tell a story’ through imagery, there are certain rules of thumb I’ve come to learn—rules that can almost instantly notch up photography skills. Here, then, is a quick list of points to bear in mind each time you’re poised to click that shutter button, and a few associated techniques I use that can help nail that shot.

Focus: Even the best software and most advanced computer cannot save a photograph that’s out of focus. Unless you intentionally want blur in your photograph, you absolutely and positively need to ensure that the key subject in your shot is in focus.
viewfinder Technique: Master the art of pre-focusing the camera before shooting. Pre-focusing or focus lock is a mode that almost every digital camera has—it’s what enables you to half-press the shutter button (during which time the camera focuses, calculates exposure, and blazes through all the processing required to take that shot). The actual photo is captured only when you completely press the shutter release button and you hear the ‘click’. So, yes, get used to pre-focusing.
Next, Look through your camera’s viewfinder and you’re likely to see a pattern similar to the one shown above. This pattern helps you determine how the camera focuses. In this case, the five double-bracket boxes indicate the five focusing zones the camera uses to determine which part of the scene to focus on. The box in the center of the viewfinder is your best friend—set your camera to ‘Center Focus’, the mode that only considers that center reticle as the focus point. Then point the camera so that the center point is on the subject, half-click, then reposition the view to frame as required before completely clicking. This technique will ensure your key subjects are always in focus—no more blurry person in the foreground and sharply focused (but boring) trees in the background.

Composition: Composition is the process of framing your scene, so that there’s a balance The historic Pigeon Point lighthouse on Highway 1among all of the elements. When looking at a scene through your camera, think of the scene as being divided into imaginary thirds, both horizontally and vertically (see the lighthouse example here). As a rule of thumb, aligning the key elements in your scene with these ‘third’ positions is proven to lend balance to photographs. Sure this is subjective, but view online examples using the ‘rule of thirds’ and you’ll see what I mean.
Technique: The trick is to frame your scene so that the key elements get the most ‘visual weightage’ and the lesser elements are eliminated. Feel free to also use the zoom, or move and change your perspective until you find the right frame. Hint: Use the focus lock technique described earlier right before you frame. That way you can focus on your key subject, then move it to a different part of the frame for creative composition before clicking to capture the photo. Even after you’ve shot the photo, feel free to crop your image to eliminate unnecessary elements (for example, random people at the edge of the photo, or an intrusive tree branch spoiling an otherwise good portrait).

Exposure: Exposure is actually a pretty complex part of photography, and one that is integral to the art. It is the process of determining the correct shutter speed, aperture and film speed, which determines how much light is captured by the camera. Fortunately, today’s digital cameras do all of the hard work for us, and compute these values in a blink of an eye during the time it takes to press the shutter button! Correct exposure means that the key element of interest in the photo (be it a model, car, landscape or pet) looks naturally lit—not to dark or too bright.
Exposure Technique: As a rule of thumb, if your key subject looks badly lit (too dark or too bright), point the camera so the subject is in the center of the frame, then focus lock (yeah, focus lock again—it’s that invaluable!), then reposition to frame the scene as you desire before clicking. If you’re so inclined (and if your camera supports it), play around with the shutter speed or aperture to make your camera take in less or more light from the scene (higher shutter speed or higher aperture number=lesser light into the camera, and vice versa). Take heart—minor mistakes in exposure can be fixed using software like Adobe Photoshop or Lightroom, or even photo managers like Picasa.

Subject: Finally, a good photo also depends on how good the subject is, so keep your Shastaeyes peeled for great photo opportunities. Good photo ops needn’t be posed; even the most mundane of scenes—the rapture of a dog playing in the street, or the thematic contrast of an old man standing beside a little child—are great photo ops.

Technique: The trick is to get sensitized to noticing these opportunities—very often the real photo is not immediately apparent. You need to move around, sometimes change your point of view to notice a potentially great shot. Even for posed photos, try to set up the scene to bring the best out of your subject. Make them smile, grant importance to key attributes in their personality, or try to reposition them so they’re in soft lighting where possible (maybe shoot in the natural light of dawn or dusk).

At the end of the day, the secret lies in technique. You don’t need to master every mode of your camera to be able to take photos that tell a story, but bringing the elements above together will lift your photography from amateur to a definitive prosumer. Beyond these basics, there are several methods available that can lift your photography even higher—image processing, HDR etc. But that’s another story. Best of all, digital photography is forgiving when it comes to practicing: hit the delete button and start over! So go ahead—experiment away.

Friday, April 23, 2010

The holy grail of computer graphics

God of War III When it comes to serving up high-quality graphics on a computer, we’ve come a long, long way indeed. From the days of Pong, Atari and the Commodore 64, we now have supercomputing-class boxes in our very home in the form of devices like the PlayStation 3. Even computers, with their graphics card containing fancy components like stream processors that boast of delivering realistic graphics in games and visualization applications, there doesn’t seem to be any slowdown in the pace of innovation in this exciting sector of computing. Computer graphics bigwigs like ATI and Nvidia continue to pursue the honor of being top-dog graphics company by creating more powerful graphics processors, more transistors and ever higher clock speeds.
The story so far
All 3D scenes are composed of little ‘facets’ called polygons—the greater the number of polygons to build a 3D model, the greater the detail. Faster processors enable faster polygon processing, resulting in more detailed scenes that can be rendered quicker. Simple, right? However, this approach is not necessarily one that is extensible, especially given that these days chip fabrication processes are pushing the 55 nanometer range (which is very close to atomic dimensions). So physically, there’s every possibility of running into a stone wall in the near future—it is not possible to fabricate at sub-atomic dimensions. Unless of course scientists make massive leaps in practical quantum physics. But that doesn’t look likely.

The game changer
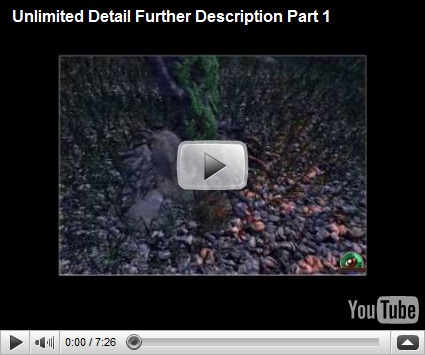
So along comes a self-taught enthusiast from Australia called Bruce Dell, who proposes a completely different graphics rendering paradigm called Unlimited Detail. He suggests that polygon-processing capabilities should no longer be the baseline of graphics computing prowess. The idea is to treat every point of light on your monitor (yes, the pixels) as the prime element in the 3D scene. In the 3D world, these discrete points are called voxels (many of which make up point clouds). With Unlimited Detail, Dell claims that the rendering engine now acts much like a search engine that basically just decides which points of light to show on the screen, depending on the particular view that needs to be displayed in that 3D scene, the resolution of the screen and other such factors. This approach can drastically cut down the amount of processing power required, as the rendering engine only concerns itself with showing what a user sees. The net result? Hyper-realistic 3D imagery that can be rendered completed in software, with no special hardware support required. I know, it does sound too good to be true. It’s still early days for this technology, but this proof-of-concept demo of Unlimited Detail here provides a compelling argument indeed.

Unlimited Detail - an explanation

There’s another video from the creator of this technology, where he provides a more narrative explanation of how this technology contrasts to the current-day approach.

If this technology does take off, I can’t wait to see God of War 4 in Unlimited Detail. Wow.

Thursday, June 18, 2009

Mobile gaming: Augmented reality with the Nvidia Tegra

tegra_3d_largeThese days, consumers increasingly want to take their experiences with them—be it gaming, movies, music, or the Internet. Devices like the Sony PSP, the iPod, multimedia cellphones, and video-capable portable media players do just this—they provide entertainment no matter where you are. But when it comes to portable devices, there are several invisible yet real barriers to a good experience—battery life and processing power. Manufacturers are grappling with these very issues while developing the next funky cell phone or portable gaming device. The Holy Grail lies in the ability to integrate console-class graphics capabilities with day-long battery life. And it looks like Nvidia (a leader in the development of processors for gaming and visualization) is very close to that elusive goal. With the launch of their Tegra processor, they can now offer phone and handheld game device manufacturers the ability to play high-definition movies and desktop class games on portable devices. If you’re a gamer, think Doom 3 class graphics on a handheld device. If you’re movie buff think watching 1080p-class high-definition video on a ultra-crisp portable OLED screen.

It gets better—when you marry the inherent portability of devices like cell phones and Mobile Internet Devices with the fact that they have fairly high-resolution cameras, something amazing happens. Check out the video below of a portable device powered by the Tegra processor, and how developers have been able to ‘augment’ the game on screen with the real word as seen through the mobile camera. Very, very cool.

Augmented reality enabled by the Nvidia Tegra processor


Imagine owning a phone in the near future having this kind of capability, and running around a table-top map with friends in a multiplayer game, or even taking the game outside the house and augmenting the undead into your quiet neighborhood—sounds trippy! Only problem I see is gamers of the future having to grapple with the inability to detach themselves from their virtual world, and get back into the here and now. But hey, it’d be a fun ride before that.

Marketing folks have already jumped onto the augmented reality bandwagon—check out this cool marketing campaign by Ford UK, to promote the launch of the Ford Ka.

Wednesday, May 13, 2009

All-time great sci-fi movies of the videotape era

When it came to figuring out what to do with my life, there never really was any doubt about what I’d become—an engineer. I remember the numerous times I stoically opened those steel wind-up alarm clocks, to see what made them tick, or took apart music systems (even my VCR, when I was all of 10 years old, to find out how to un-jam that tape!). Needless to say, not all of these exploits were successful—in fact, most were outright disasters. Over the years, I left behind a sizeable wake of cannibalized motors from toys, wrecked stereo systems, and bed sheets that bore scars from trysts with 240-volt electricity (yes, there was the time I nearly got a nice domestic fire going—and we didn’t have a fireplace).

Sure I had my fair share of chastising, but through it all mum and dad did all they could to ensure that I had a steady supply of science and technology influences throughout my formative years—from the junior microscope sets, to telescopes, to electronic do-it-yourself kits. I was, indeed, blessed.

But when it came to igniting a spark of interest in the budding scientist in me, the biggest influencers had to have been movies—I believe the 80s produced some of the most spectacular science fiction movies ever created. Looking back, the fact that the special effects were nowhere as advanced as today’s productions did in no way detract the sheer innovation and soul that characterized many of those movies. Being the era of VHS (where copying was cumbersome and downloading was out of the question), every movie was treasured, and the act of watching it was a family affair, often followed by hours and days of animatedly discussing, dissecting and reliving the storyline.

In no particular order, here’s a list of what I believe are some of the greatest sci-fi movies of the videotape era. If you ever get a chance to watch any of these, I guarantee that they’ll be pure, family entertainment. And if you have a budding techie sitting on the couch in your living room, (s)he’s bound to have great memories of them in the years ahead.

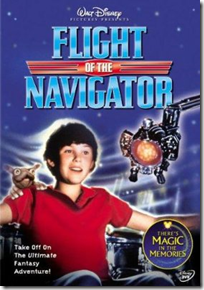
Flight of the Navigator (1986)
A fascinating story about a UFO that selects and befriends a boy to help it get back home. I still think that this is one of the most amazing-looking UFOs ever shown on celluloid. Period.
FlightOfTheNavigator
D.A.R.Y.L. (1985)
Another movie that centers around a young boy, who’s the subject of NASA experiments that make him hyper-intelligent. And the best part of this movie (spoiler alert ahead!)—in the end he flies a Lockheed SR-71 Blackbird—my favorite aircraft, bar none!
DARYL
TRON (1982)
Conceptually, this movie was way ahead of its time—a computer geek gets mysteriously transported into a computer, and must battle his way to get out alive—by fighting against its games, one on one! This movie had one of the most spectacular effects of its time, and the action sequences (on those bike thingies, especially), were awesome!
BTW: TRON was a function used in good ol’ programming languages like BASICA, meaning TRaceON—it was used for debugging!
TRON
Return to Oz (1985)
If you liked the Wizard of Oz, you’re bound to love this movie. This isn’t a happy, bouncy continuation of the original, but instead puts Dorothy and her band of misfits in a darker, more sinister realm. Fascinating story, great characters.
ReturnToOz
Return of the Jedi (1983)
Which geek doesn’t revere this movie? This was actually the first Start Wars episode I watched, and I instantly fell in love with every aspect of it. After this movie, there was no looking back from Han Solo, the Light Sabres, and Vader.
ReturnOfTheJedi
Short Circuit (1986)
A charming movie about a battle robot that takes on human characteristics after a close encounter with a lightening bolt. Besides looking downright cute in its own right, this robot is actually quite evocative of our modern-day Wall-E.
ShortCircuit
Back to the Future (1985)
A sports car that doubles up as a time machine, hover skateboards, and a host of other cool gadgets—ingredients for one rocker of a sci-fi movie! Because of this movie, the gull-wing DeLorean was one of my favorite sports cars at the time. Arguably one of Michael J. Fox’ most memorable roles, this is one of those must-see, must-own pieces of cinemagic!
back_to_the_future
*batteries not included (1987)
Looking back, I think this is a grossly underrated movie—it’s a story about an adorable pair of extra-terrestrial robots that ‘adopt’ a tenement-full of misfits. A brilliant story, and great visual effects.
batteries_not_included
E.T.: The Extra-Terrestrial (1982)
Spielberg’s magnum opus. ‘nuff said.
ET
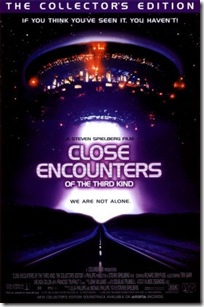
Close Encounters of the Third Kind (1977)
Answering all those questions surrounding aliens and UFOs, this movie was a complete eye-opener, and a visual tour de force of its time.
Close Encounters of the Third Kind

All images sourced from www.imdb.com

Monday, April 27, 2009

Reduce noise in your digital photos

Noise is one of the most evident demons in digital photography—often manifested in those numerous, tiny, unsightly colored spots seen on the skin, skies and shadows in photos. While the best way to assuage image noise is to set your digital camera to use a lower ISO setting, this isn’t the optimal solution situations like shooting a dark scene, for example. So what do you do if you’re forced to shoot at a higher ISO, but still want to reduce the amount of noise in your images? You have several options—using one of the noise reduction filters in your image editing software, or using dedicated noise reduction tools like Neat Image or Noise Ninja. But there’s a simpler (and free) method to reduce the noise in your digital photos while maintaining overall image sharpness—it’s a technique based on the principle of averaging. Before we go into the details of this technique, a heads up on where this technique can and cannot be used:

  • You can use this technique to significantly reduce random image noise and sensor noise. This technique cannot be used against fixed noise patterns like bands, chromatic aberrations etc. The adjoining image shows what sensor (random) noise looks like.
  • This technique can only be used in still life shots or landscapes. It cannot be used to on shots of people, animals or scenes containing motion. You’ll see why later.

And now, on to the method.

Shooting the images: You will first need to take several shots of the same scene. The trick is to take the exact same photo of the scene keeping all settings constant across the shots. It is imperative that the images are perfectly aligned, so its best to shoot using a sturdy tripod, or by resting your camera on a solid surface. Noise_several_Images
Averaging the images: The cool thing about a mathematical average is that it brings a range of values to a ‘mean’ level. When applied to digital noise, averaging has the effect of reducing the effect of random noise across the image. Here’s how you do it:  
Load the images you shot into your favorite image editor. I’ve used Photoshop in this example. Make sure to load each image into its own layer, and also ensure that each image exactly overlaps the other—do not displace the images during this step. If you’re using Photoshop, the best way to ensure all images are aligned is by holding down [CTRL] and [SHIFT] while dragging the images into each layer with the Move tool. Load_Stacked_Images
Change the opacity of each layer. Averaging is achieved by changing the opacity of each layer. Basically, each layer will need to contribute the same amount to the overall effect. Think of these layers as transparencies stacked atop each other—if we use four layers and we set each one’s opacity to 25%, it won’t achieve the effect we need. Why? Because the higher layers will need to be less opaque (more transparent) than the ones below, as these higher layers affect the apparent opacity of the ones below.
Case in point: If you’ve shot five source images, you will need to set the layer opacity as follows: 
Layer4: 25%
Layer3: 33%
Layer2: 50%
Layer1: 100%
This is assuming Layer1 is at the bottom of the stack and Layer4 is at the top as indicated alongside. Also ensure the layer blend mode is Normal. You’ll see the effect of the noise reduction as you change the opacity levels.
Layer_opacity_settings

If you’re mathematically inclined, the formula for calculating the opacity of each layer is:

 Averaging formula

Use this formula and you’ll figure out how we arrived at the percentages in the example above. You can use as many images as you want, but four or five images should be sufficient—the results of this technique won’t noticeable even if you use more.

When you’re done altering the layers’ opacity, merge them and save your image.
Voila, you have a cleaner image! I shot this photo at ISO 1600 on my Nikon D40—click below to see the results up close.

Noise_Before_After

Tuesday, March 31, 2009

Audit your computer’s hardware and software

WinAudit Ever wanted to know the gory details of your computer’s hardware and software configuration without having to painstakingly study each of its components? If you’re a geek, that answer would be a resounding yes. If you’re not, it doesn’t hurt to know, right?

Even though this isn’t the most exciting of ways to spend your time, knowing what your computer consists of is knowledge. And that’s power! I use WinAudit—a useful freeware application that does exactly this. Sounds simple enough, and it is. But the level of detail it brings up in the audit report is quite amazing—be it the serial number of your computer’s optical drive or the exact stepping of the processor, this application quickly and efficiently generates a host of information about the target system.

The program is a snap to use—simply launch it, click the Options button to select the categories you want to audit, then click Audit. It will run for a couple of seconds, then display its findings in neat categories. You can also save this report in a variety of formats including PDF, CSV (for Excel), Text, HTML or even XML. Better yet, you can launch this program from the command line—meaning you can write a simple batch file, and make it do its work with a single click. Check the program’s help in the ‘Command Line Usage’ section for information on the numerous tags you can use for automated command line logging.

As an example, here’s how to create a batch file that launches the program, audits the most important system categories, and write a CSV file to the same location as the program:

  • Open Notepad
  • Type the following: WinAudit.exe /r=gPtabz /o=CSV
  • Save this file in the same directory as the WinAudit program, and name it Audit.bat

Simply run this batch file—the program silently audits your system and creates a detailed system report in the same directory. You can also copy the program and the batch file to a USB drive, and use it to quickly generate a report of several computers. If you’re a system administrator, you’ll find this immensely useful for quickly generating system audit reports of several computers. If you’re not, it’s a cool tool to learn about your computer’s detailed specifications. Also use it while buying a new computer or laptop to make sure you’re getting what you paid for!

Monday, March 16, 2009

Fluid interfaces, and wearing your sixth sense

Sixth_Sense_interface I recently came across this this truly awe-inspiring implementation of technology--a device that empowers you to intuitively pull up information on virtually anything in the world around you. Sounds too fantastic to be true? Click the image to see this proof of concept in action, as demonstrated at a recent TED presentation. And if you're looking for a regular dose of truly cutting-edge thinking and ideology, I highly recommend visiting the TED Web site and watching (or downloading) their fantastic lectures.

I think I just used up my quota of superlatives for this month. But with reason.

Friday, March 13, 2009

Automating your Web browser

These days, finding ways to be more productive and efficient is key to staying ahead. When it comes to general office work, browsing the Web or working on online forms and Web sites takes up a significant part of our working hours. In the normal course of working on Web sites, you'll notice a large amount of repetition in the tasks you do--logging into your favorite sites, entering registration information into online forms, transferring image and text data between your computer and the Internet... this list goes on. So how does it sound if I told you there's a way to automate these repetitive tasks, so that they can be performed with a single click? For starters, it would save a heck of a lot of time each day, and accrued over days and months it would translate into considerable savings and higher productivity, leaving you with more time for stuff you like doing!

iMacrosI use Firefox as my primary Web browser, and have been using a great little Add-on called iMacros to automate many things I do on the Web. From doing something as simple as logging into my Gmail account, to rebooting by DSL modem at specifics time each day (I'm on an Internet plan that offers unlimited data transfer between midnight and 8am, but I need to restart my modem at these times), I've created macros that have enabled me to free up gobs of time. Here's a brief walk-through for automating your Web browser:

First, download the iMacros Add-on for IE of Firefox from here. After installing it, launch it by clicking on the toolbar button that shows up in your Web browser.
Hint: Click the images for a larger view.
iMacros sidebar
You'll see several demo scripts in the sidebar--double-click one and you'll see it launch into action using demo scenarios. If you're so inclined, you can click on a preset script, then click the Edit Macro button to view the code that drives the script. Reading these lines should give you fair idea about how it works. iMacros sidebar - Edit
If you don't want to be bothered with writing code, you can simply have iMacros record your actions as you click through Web sites and enter information--the relevant code gets created automatically. To record a new macro using this method, click the Rec tab in the sidebar, then click the Record button. Then use your browser as you would while performing a given task--iMacros records your actions such as information typed in, and buttons, tabs and links clicked. Click the Stop button when you're finished. Rename the new macro that appears in the side bar to something indicative of your recorded task. iMacros sidebar - Record
The next time you want to run that task, simple double-click on the macro name, and watch as iMacros launches and does your work for you--in record time!

To help you get up to speed, see the iMacros support page for tutorials and code samples.

Next up, I'll write about how I created a script that reboots by DSL modem at specific times, enabling me to better utilize my unlimited night time download bandwidth.

Monday, March 2, 2009

Origami works of art

In an earlier post, I mentioned my interest in paper folding, and how fascinating it is to build interesting objects from simple materials. Back in school, I remember those lazy summer days, when I used to try and create everything from Origami flapping birds, to geometric shapes, to aerodynamically accurate paper aircraft! Of course, not all these endeavors were met with success, but it was a heck of a lot of fun.

Having been bitten by the paper folding bug recently, I decided to dig a little deeper and find out exactly how complex this art form can get. These days, there are hundreds of Web resources that will teach you the fine art of making paper models, complete with scientific explanations, and even instructional videos--it's on a different level altogether! An hour of digging through online resources and I came away amazed. Here are some of the best paper folding models I found--they can take anywhere from a few minutes to over 40 hours to create!

First up is what is touted to be the World's best paper airplane. Known as the O'Reilly airplane, it features all the aeronautics you could want in a paper aircraft--working rudders, stabilizers and flaps. Best of all, it takes minutes to build, and is scalable--the larger and stiffer the paper, the better it is likely to fly!
Click here for the step-by-step folding instructions, and here for a video on how to fold the plane.
BestPaperAirplane1
Another one of my personal favorite paper airplanes is the 'Barnaby'. Designed by an ex-US Navy pilot, this plane is one of the easiest to build, and it flies like a dream!
Click here for the step-by-step folding instructions.
Barnaby
Moving on to more traditional forms of Origami, one of my favorite (and more challenging) paper objects is the Kawasaki rose. You'll need at least intermediate paper folding skills to attempt this model, but the results are great.
Click here to download the PDF of the folding instructions.
Kawasaki rose
Then there's this ultra-cool and super-realistic Noboru Miyajima bat! The level of detail and faithfulness to anatomy in this model is truly awesome. This is a rather involved model (it consists of a shade over 100 folding steps). But then again, the results are fantastic.
Click here to download the PDF of the folding instructions.
Noboru bat
If you're a movie buff, you'll be stoked by the characters on this page--you'll find Gandalf, Yoda and even Wall-E, all Origami-fied! Not all the authors have shared the folding instructions, but you'll find a video of the Wall-E character on this page. wall_e1

Later on, when you get bored of folding 100-step Origami characters, you'll want something that presents a bit more of a challenge. If you're like Satoshi Kamiya, a 27-year-old guy from Japan, you should be ready for the 200+ step designs. This guy is credited with developing some of the most advanced and complex Origami ever folded. Relying solely on his intuition and skill (that's right, no computer programs to assist), he creates true works of art with paper--from dragons, to mythical creatures, to animals and fish, check out the level of detail that's possible with with paper folding.

origami-mantis Kamiya-16_0
Satoshi_Kamiya__s_Bahamut_WP_by_Vargaskyld Ancient dragon

And then at the pinnacle of his skill...

dragon-origamiThis is an 8-inch model of an Eastern dragon, and is detailed with eyes, teeth, a tongue, whiskers, a barbed tail, and over 1,000 individual scales on its body. And yes, this model was folded from a single piece of paper. I'm in awe.

Check out this video of Satoshi Kamiya at work:

He's authored a book containing the folding instructions of all these fantastic paper models. If you're so inclined, you can buy it from here.

Finally, check out these informative online Origami resources here and here.

Wednesday, February 18, 2009

Playing classic DOS games using Microsoft Virtual PC

If you were a teenager during the late 80s or early 90s, you'll be awash with a wave of nostalgia when you read these words: Dangerous Dave. Wolfenstein 3D. Doom. Prince. Zaxxon. Brings back memories, right? If you're still clueless, these are classic DOS-based games that used to take up a sizeable portion of our leisure time back in the day! Still don't know what I'm talking about? Well, DOS is a text-based PC operating system... oh, never mind--you're way too young to be reading this post! If you really must know, I'm talking about an era where the GUI was still several years away, a time when computers were built using 386 and 486 processors, with a whopping 8MB of RAM, and 240MB hard disks. *Sigh*... those were the days--the heady, primordial era of personal computing.

capture_17022009_234951 I revisited those days recently when I was experimenting with a cool application that lets you run any operating system--current, past, or upcoming--within your present Windows operating system. That's right, you can run an operating system as if it were an application! I'm talking about Microsoft Virtual PC--a small, free software that emulates another PC within yours. Sounds confusing? Well it isn't really. This application creates an isolated area in your system, within which you can install and run a completely different operating system as if it were another computer. You can even reboot it and watch it go through the boot-up POST sequence in it's own window!

You might have heard of a similar application called VMWare, which does the same thing, but VMWare is rather expensive compared to Microsoft Virtual PC, which is free. But then Virtual PC is primarily built to run Windows operating systems, of course.

VirtualPC_Win7_Win311Among other things, I used Virtual PC to install and experiment with a beta copy of the upcoming Windows 7 (Build 7000). Alongside this, I also created a Virtual PC running good ol' DOS 6.22, and dug up a whole load of DOS applications and games. I also located and installed an ISO of Windows for Workgroups 3.11! Click the screenshot above for a larger view--there's Windows 7 on the left, Widows 3.11 to the right, and the Virtual PC Console at the lower right, showing the two running operating systems. All of this was running on my Windows XP laptop.

Here's a quick run-through of how to create a Virtual PC:

1. Download Microsoft Virtual PC 2007 from here, then install it. Run the program and you'll see the Virtual PC Console.
On first run, you obviously won't have any Virtual Machines (VMs) installed--shown here are the two VMs I created.
To create a VM, click the New... button to launch the New Virtual Machine Wizard.
capture_17022009_235739
2. Click Next to proceed. capture_17022009_235938
3. This screen displays choices for creating a new VM, using default settings to create a VM, and adding an existing VM. Select the first option, and click Next. capture_18022009_000105
4. Type in a name and select the location for your new VM, then click Next. capture_18022009_000326
5. This screen helps you configure the environment for your VM, depending on the operating system you want to install in it. Select the appropriate OS from the drop-down menu, or select 'Other'. Click Next to proceed. capture_18022009_000441
6. You can go with the recommend RAM for your VM, or specify the amount. Your choice will obviously depend on how much RAM your computer has, and the requirements of the OS you want to install in the VM.
Note: Before allotting RAM to the VM, make sure you leave aside enough for your host operating system!
capture_18022009_001111
7. The Wizard will now create a virtual hard disk, in which you'll be installing your virtual OS! Choose to create a new virtual hard disk, click Next... capture_18022009_001758
8... and specify the location and size of this hard disk. capture_18022009_001807
9. Finally, click Finish, and the wizard will create your Virtual PC! capture_18022009_001929

Your new Virtual PC will now appear in the Virtual PC Console. Double-click it to start it, and you'll see it going through the boot sequence. Obviously, on first run it will search for a boot device and will prompt you accordingly. Before you can use the Virtual PC, you'll need to format the virtual hard disk, and load an operating system on it. To start, download a bootable CD or floppy disk image from here, and load the appropriate ISO file using the Floppy | Capture Floppy Disk Image or the CD | Capture ISO image. You should now be able to format the virtual hard disk as you would a normal one. After that, load your operating system and configure it to your liking!

Here are a few screenshots from my 'Classic DOS games' virtual machine.

DOS_nostalgia

For more resources on Microsoft Virtual Machine see here and here. Also see here for special information on running MS-DOS on Virtual PC 2007. Enjoy!

Related Posts with Thumbnails