In a recent post where I wrote about how I process RAW images from my Nikon D40 using Adobe Camera RAW, a reader replied asking about RAW processing tools with a little more chutzpah. I've been following the buzz that's surrounded the recently-launched Adobe Photoshop Lightroom 2, and decided to dive in and try it out.
I'm the kind of software user who builds long-term relationships with my applications. I need to coax myself a fair bit before committing to anything 'new and improved'. When I do encounter something that promises to change the way I live, I go through several phases that include flirting with the new software, reading about its capabilities and other users' experiences with it. It takes a while before I convince myself to toe-in and test the waters.
When it comes to processing images from my camera, I've always known, loved and trusted Adobe Camera RAW. Sure, it's no Swiss Army Knife of image processing, but it's simple, efficient and entirely effective. I've been using it for years and have never really felt the need to use any other solution. But recently, the lure of an enticing new interface, a workflow-optimized layout, cool new tools for touching up portraits, and advanced photo cataloging capabilities was too much. A couple of days ago, I downloaded the trial version of Adobe Lightroom 2 from its Web site here (free sign-up required), and have been deep diving into its capabilities ever since.
Some of the key 'a-ha' points with this application include:
- Local adjustment brush: You can now 'paint in' exposure, brightness, contrast, even clarity and sharpness. These effects work like a layer mask, so you can also vary the intensity of these effects. And all of these changes are non-destructive.
- Enhanced organizational tools: The process of importing files from disk or memory cards is quicker and more intuitive even compared to Bridge in Adobe Photoshop.
- Volume management: You can browse and edit directories, drives and files as you would using a standard file management tool, and easily create quick groups of images.
- Extensible architecture: Like Photoshop, Lightroom 2 can accept plug-ins written by third-party developers, helping extend its functionality and capability.
Other enhancements to the application include DSLR profiling, multiple monitor support, flexible print options, streamlined Photoshop CS3 integration, enhanced output sharpening and 64-bit support for Windows and Mac OS.
There are hundreds of in-depth reviews about this application out there, so I'm not going to repeat the superlatives that you'll already find in these write-ups. But here are some of the smaller aspects of this software that I personally found fantastic:
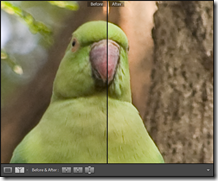
| Compare views: Lightroom 2 offers several views to help you see the before and after effects of your modifications, including split screen, side-by-side and above-below. Intuitive. Simple. Hint: Click these images for a larger view. |  |
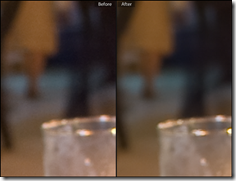
| Excellent Sharpening and noise reduction: If you shoot at higher ISOs, you'll love the new Sharpen and Noise Reduction capabilities. I was amazed as the creamy smoothness of a corrected image, and its ability to retain sharpness. I'd recommend Lightroom 2 for these two features alone. |  |
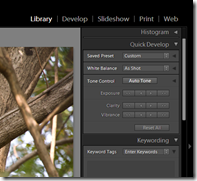
| Quick development options in the Library view: Instead of having to trundle through the detailed image settings in the Develop module, there's a Quick Develop panel that lets you adjust basic image settings in the Library module. This functionality lets you quickly make broad image modifications before drilling down later. |  |
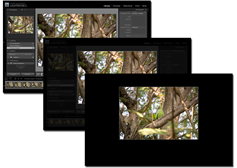
| Lights Out: This is one of those features you'll like playing with. Hitting the 'L' key will gradually dim the interface leaving only the image in clear view--great for those times when you want to eliminate the noisy background and concentrate on your photograph. |  |
| Keyboard shortcuts galore: Its easy to whiz through the interface and get plenty of image processing done quickly, after getting accustomed to the keyboard shortcuts. You can be the Liberace of Lightroom. Sorry, couldn't resist that. |  |
Lightroom 2 has certainly made RAW image processing a whole lot more fun. And it's fast. To know more, head over to the Adobe Design Center where you'll find Help files and video tutorials. You'll also find a host of informative video tutorials and end-user experiences on YouTube and MetaCafe.
Now I've only got to find a way to cough up the $299 after the 30-day trial period ends. But I'll cross that bridge when I reach it. Get it? Bridge? Adobe? Oh, never mind.
Update: Click here for information on how I set up the initial configuration for Lightroom 2, and here for my Lightroom 2 development workflow.


3 comments:
extensive...and now I will begin the search for a free tool. :)
You might want to try the free tool RAW Therapee (http://www.rawtherapee.com). Several folks over at Flickr swear by it.
thanks!
Post a Comment